I had wanted to have my own personal blog for YEARS. I have blogged for others, created countless websites, and have done social media marketing (for others) since I was 19. It took me a long time to convince myself to just launch my own blog. Yeah, self-sabotage is one of my biggest weaknesses, but that’s a another post for another day. Anyway, with the encouragement from family & friends, I decided to just DO IT. I have to at least TRY. I will regret it forever if I don’t. So here we are: my not-so-perfect but makes-me-happy BLOG!
I have had numerous requests over the years on how to start a blog. Until now, I didn’t have a platform to share my guide. So, while I’m no expert, I do have experience & I’m excited to show you the exact way I started mine (& what I’d do differently if I had to start over).
This post contains my referral links, which means I may receive a small commission if you make a purchase. Don’t worry, this is at no additional cost to you & I only recommend things I love!
Step 1. Decide what to blog about
This is probably the hardest step, or at least it was for me. I had wanted to start a blog a long time ago, as I blogged for other people, but I felt like I didn’t have anything interesting to talk about or be consistent with.
Tips on choosing a blog topic:
• Choose a niche that you enjoy. I can’t stress this enough. If you are blogging about a topic because you think it will make money, but you’ll be bored of it within a year, don’t do it. Even if you know a lot about a certain niche, if it isn’t your passion and doesn’t make you happy, blogging about it long term probably isn’t the best idea. Also, your readers will sense if you’re not passionate about what you are writing about.
• Don’t box yourself into a teeny tiny niche. Specific niches are not bad at all – in fact they can draw in just the right audience. But, make sure that there is enough to blog about!
• Brainstorm, brainstorm, brainstorm. Try making a list of a couple possible niches for your blog. Under each topic, brainstorm 20 potential blog posts for that particular niche. See which one comes easier, seems the most interesting, tends to not run out of ideas. Which one excites you? Which topic can you not wait to write about?
• Or! Do what I did – just start. I started blogging thinking it would mostly be a “mom” blog with a side of creative posts. Then we bought a house – so now I’m focused on home project posts with a side of mom stuff 😉 … It’s ok to switch topics & find what you’re passionate about. Chances are, someone can relate to your journey.
Step 2. Set up hosting & domain
I read an analogy once that Hosting Companies are like landlords with apartments (server space) for rent. Our websites/blogs need a place to live – on a server. So basically paying for hosting is renting space for the blog to live. Luckily for us, renting space for our blog to live is much cheaper than renting an apartment!
The hosting company that I personally use & recommend is Bluehost. I have used it for many websites over several years. I even use it for my boyfriend’s business website. It is reliable, for one, but their tech support is great. *Just recently, an update failed on the business website & had a privacy error. This was a huge deal, as customers trying to fill out applications, etc. were not able to. A quick live chat with Bluehost & it was back up and running within minutes. They are seriously easy to work with and are really helpful in my opinion.*
Here’s how to get started:
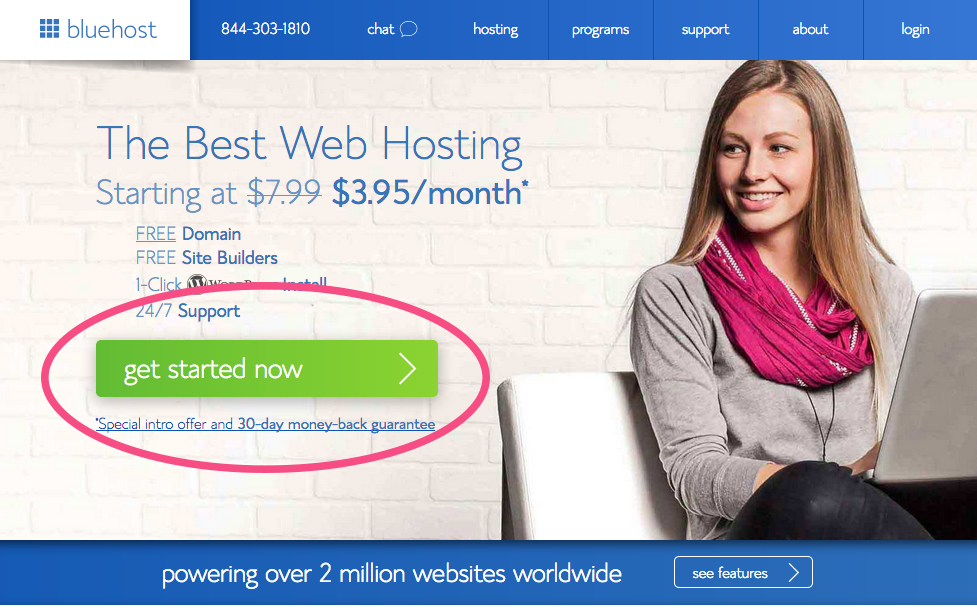
• Click here to head over to Bluehost (This link opens in a new window, so you can keep following the steps here!) Once you’re on the home page click the “Get Started” button – see below screenshot:
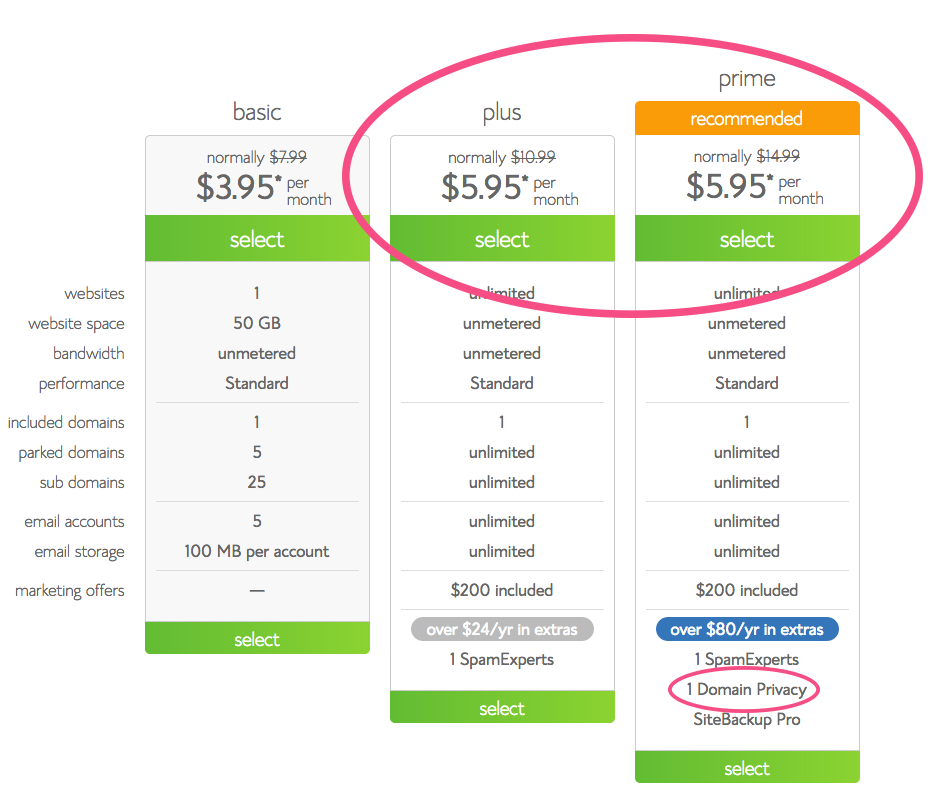
• Select your plan
Now, you get to select your plan. We have the “Plus” plan, because of the unlimited features & unlimited websites. The “Prime” plan has domain privacy, which helps protect your personal information. Without domain privacy, anyone can look up your site and find your name & address. If you’re a business and you don’t mind, great. But for many of us bloggers, that information should be PRIVATE. We purchased domain privacy separately (when we bought our domains), because we actually owned our domains for several months before we launched anything.
Anyway, choose the plan that makes the most sense for you now. You can always upgrade or downgrade later! You can also add Domain Privacy later if you don’t want to include it now.
• Register your domain name
Now it’s time to register your domain name. My domain is littleblondemom.com
For me, choosing my domain name was not easy. And by not easy, I mean it stalled my blog progress for months. I was trying too hard to be catchy. I didn’t want to use my name. I didn’t want it to limit me to one topic. I thought too hard about it. Then one day it hit me. My son calls me his little mom – he’s almost 5 feet tall & 80 lbs – I’m 5’5″ & about 95 lbs. Littlemom didn’t seem to flow & it wasn’t available at the time. Then littleblondemom.com came about. It describes me pretty literally, but I think it’s catchy and easy to remember.
*If you’re struggling to choose a domain name, talk to friends, family, your spouse, and bounce ideas off of them. Or you can comment below or shoot me an email & I can try to help.*
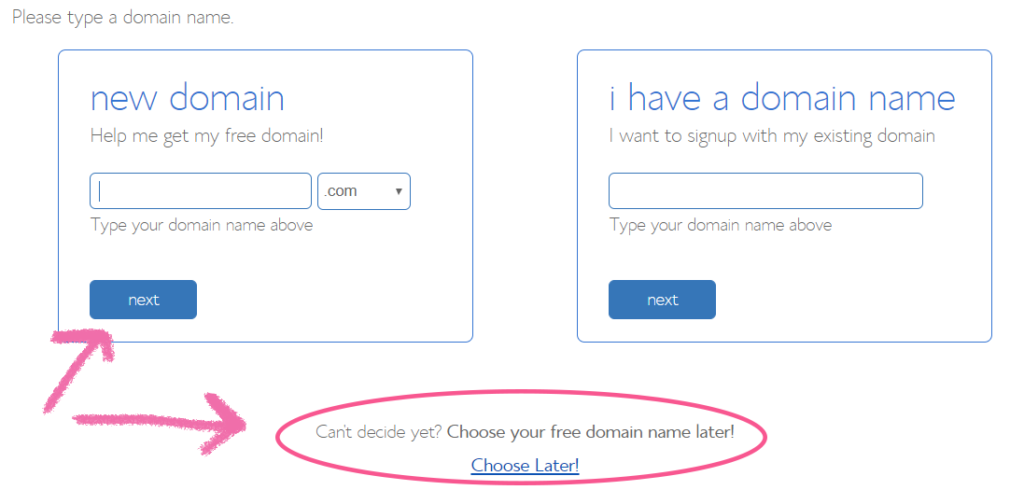
Once you’ve decided – type in your desired domain on this screen:

If you’re still brainstorming or if your domain isn’t available and you need to re-think or rework it, you can always choose your free domain later. (Leave the domain box blank & just hit next. Then a prompt will show up below that says you can choose later.)
• Enter your info
The next screen is where you put in all of your information. Be sure to use the email account you check the most frequently. This email address will be how you’re contacted by Bluehost & also how you’ll retrieve account information (password) if you forget/lose it.

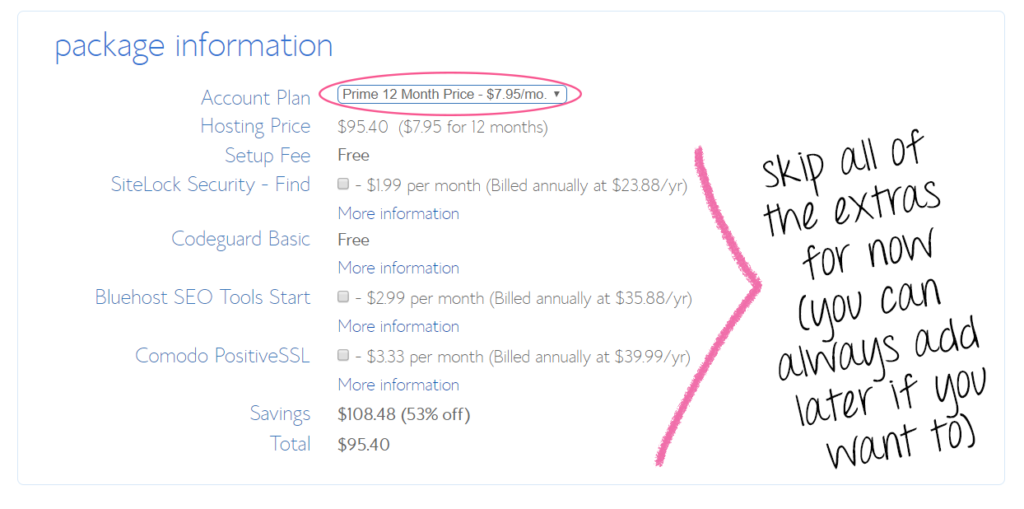
• Choose your package & payment plan
After you fill out your information – you’ll choose your payment plan and any “add-ons.” You may notice that there is not a monthly payment option, which at first turned me off. I started to do research, realized monthly hosting plans were much more expensive (per month) & came straight back to Bluehost.
If you can swing it, try to purchase more than one year. The cost goes down per month when you increase amount of years. If you can’t (we only did one year to start), then just pay for 12 months. It is still not very expensive and then you don’t have to think about it for awhile. It is definitely worth it.
Also – as you can see my note below – skip all of the extra add-ons for now. If you decide you want them later, go for it. If you chose a plan without domain privacy, that’s the only “add-on” I recommend to begin.
• Payment info
Next, enter your payment information. Make sure to read the terms & policies & then… SUBMIT!
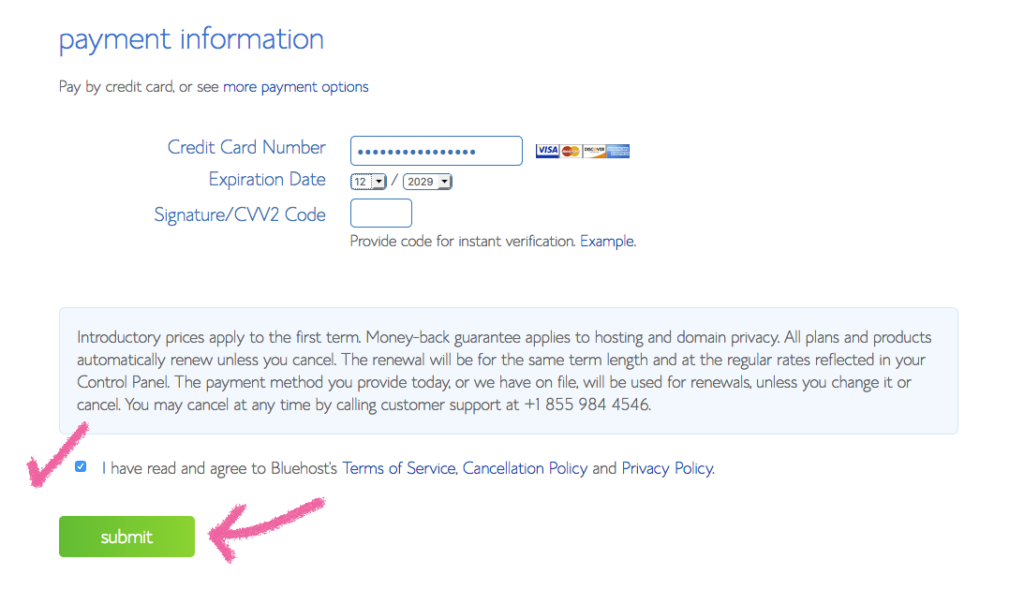
After you hit submit, you may be offered extras & add-ons. You can just ignore all of this & click “No, thanks.”
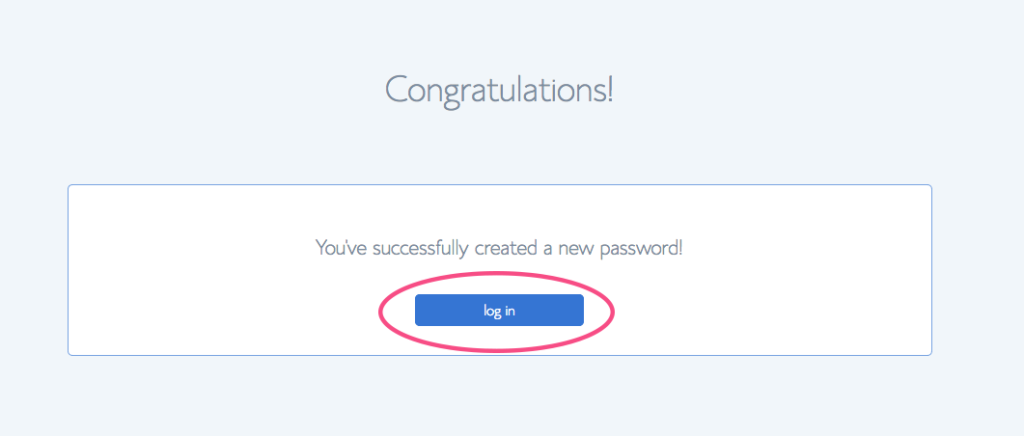
• Choose a password
You need to choose a secure password but one that you won’t forget. This is how you will log in to your account.
Step 3. WordPress
After you choose your password – go ahead and login to your Bluehost account.
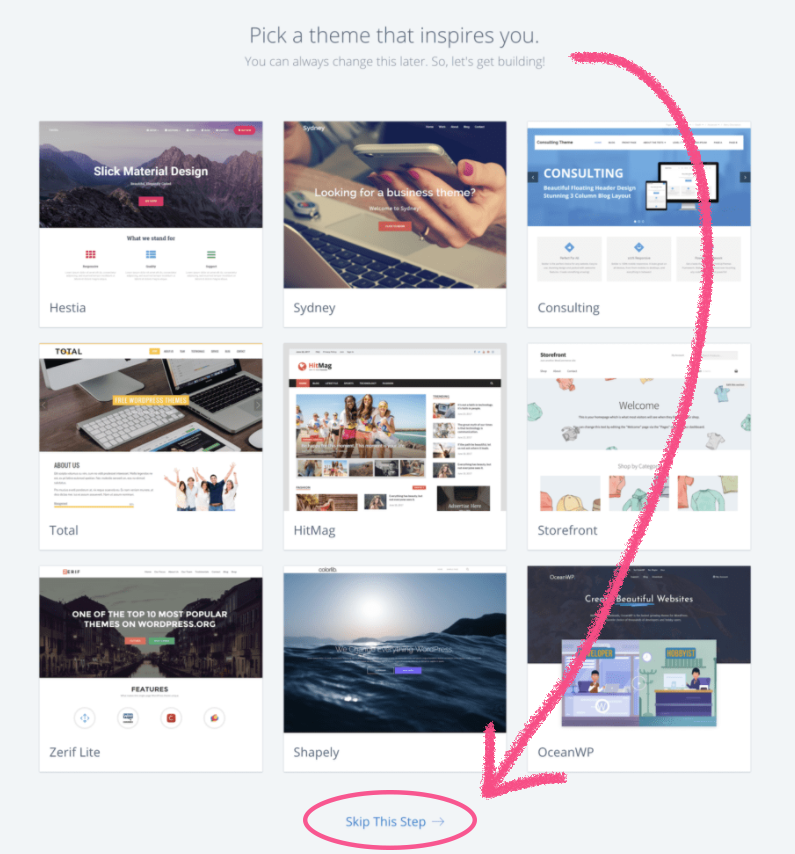
• Skip the free themes
After you login, you will be presented with several free themes. In my opinion, just skip this for now (bottom of the screen). Chances are, they aren’t what you really want and once you’re in WordPress, you’ll have many more options. Plus you can use the pre-installed theme for the time being, until you learn more about WordPress & your blog.
• Start working on your blog!
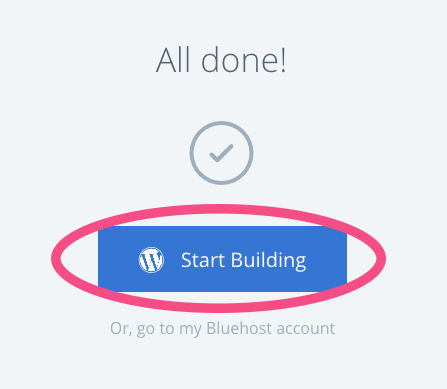
You can certainly go to your Bluehost account if you need to. But at this point you should be good to go ahead and click “Start Building.”
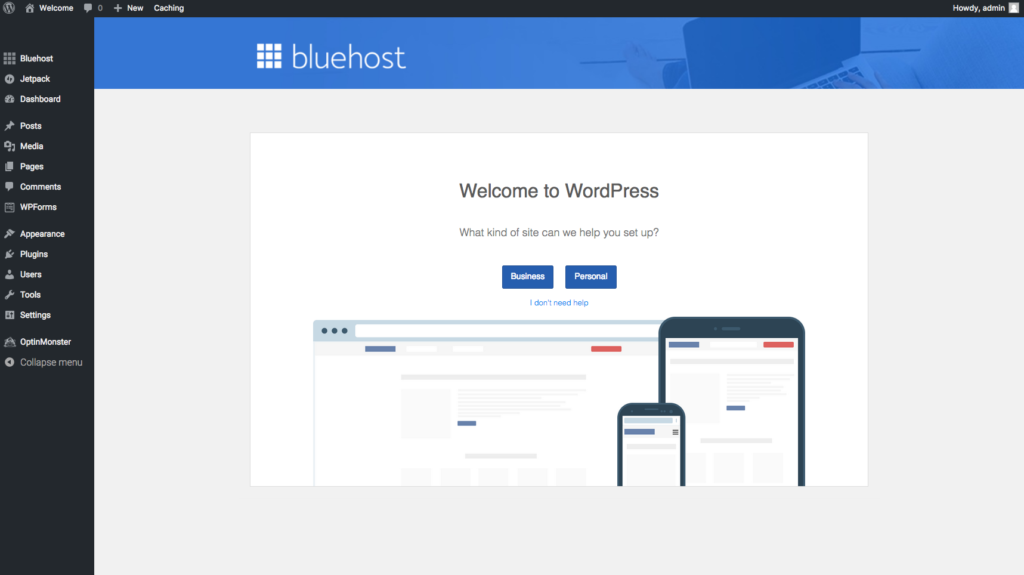
• Yay – your new WordPress site!
You’ll be brought to your new WordPress site! It may look totally foreign, but I’m telling you, it won’t be for long! You can follow the prompts on this page or you can skip the help (click “I don’t need help”) and start from scratch.
Side note: You don’t have to log in to Bluehost each time you want to update your blog – just go: yourdomain.com/wp-admin – obviously replace “yourdomain” with your actual domain name 😉
There you have it! Your very own BLOG!
Congratulations! But, now what?!
Your blog site & hosting are set up – what next? Well, the actual blogging part is up to you. Here’s a couple tips:
• I would recommend customizing your WordPress site to make it LOOK the way you want it to. Get familiar with your control panel. Try & preview different themes. Research WordPress & watch Youtube videos. Don’t get too caught up on the appearance at first, this can be changed later. If you wait until it’s “perfect,” you’ll never be done.
• Most bloggers suggest writing an “About” page first. Yeah, I didn’t do that. I decided to jump right in to posts. If I would have waited to launch – I still wouldn’t have this blog. Yep, that’s right, I still don’t have an About Page. I’m working on it… Ha!
• Start writing. Write blog posts. Get on a schedule. Have fun with it!
• Grow your blog. Keep writing – updating – interacting. After you have several blog posts published, start sharing them on social media. This is going to help drive traffic to your blog.
• The last thing I’m going to add – DON’T GIVE UP. If this is truly what you want to do, don’t quit. It can be super overwhelming, but you can do it.
Starting my blog has been one of the best things I’ve ever done. I’m so happy I did. It’s not a huge investment and I’m enjoying every step. I just keep learning as I go. Such a fun journey, really.
Comment below with any questions! Once you get your blog up – drop a comment here with the link to your site. I’d love to check it out!